Entering the food photography world
It’s been a minute since my last post, so I wanted to update everyone with my latest adventure- entering the world of food photography!
In this article, I’ll be discussing how I learned new techniques while transforming the image of Better with Butter Bakery.
A photo I took for Better with Butter Bakery for her Instagram post.
Back in November, my friend Rachael decided to open up a home bakery business after decades of hobbyist baking (although let me tell you, nothing about her craftsmanship is hobbyist- she’s been killing the game the entire time). She quickly realized that she could not manage her social media alone and that simple iPhone photos could not get the job done. So she hired me on as her photographer & media manager for her Instagram account.
Full disclosure: I’ve NEVER done food photography before. This is likely a detrimental statement for my own business here, but I want to run NikPix as transparent as possible, and I am always honest with my clients and audience. I took this project on not only to support Rachael, but I have so deeply wanted to learn how to do product & food photography for many years. Two birds with one stone- help a friend out, and learn how to do a stylized type of photography.
Approaching with the right mindset
.
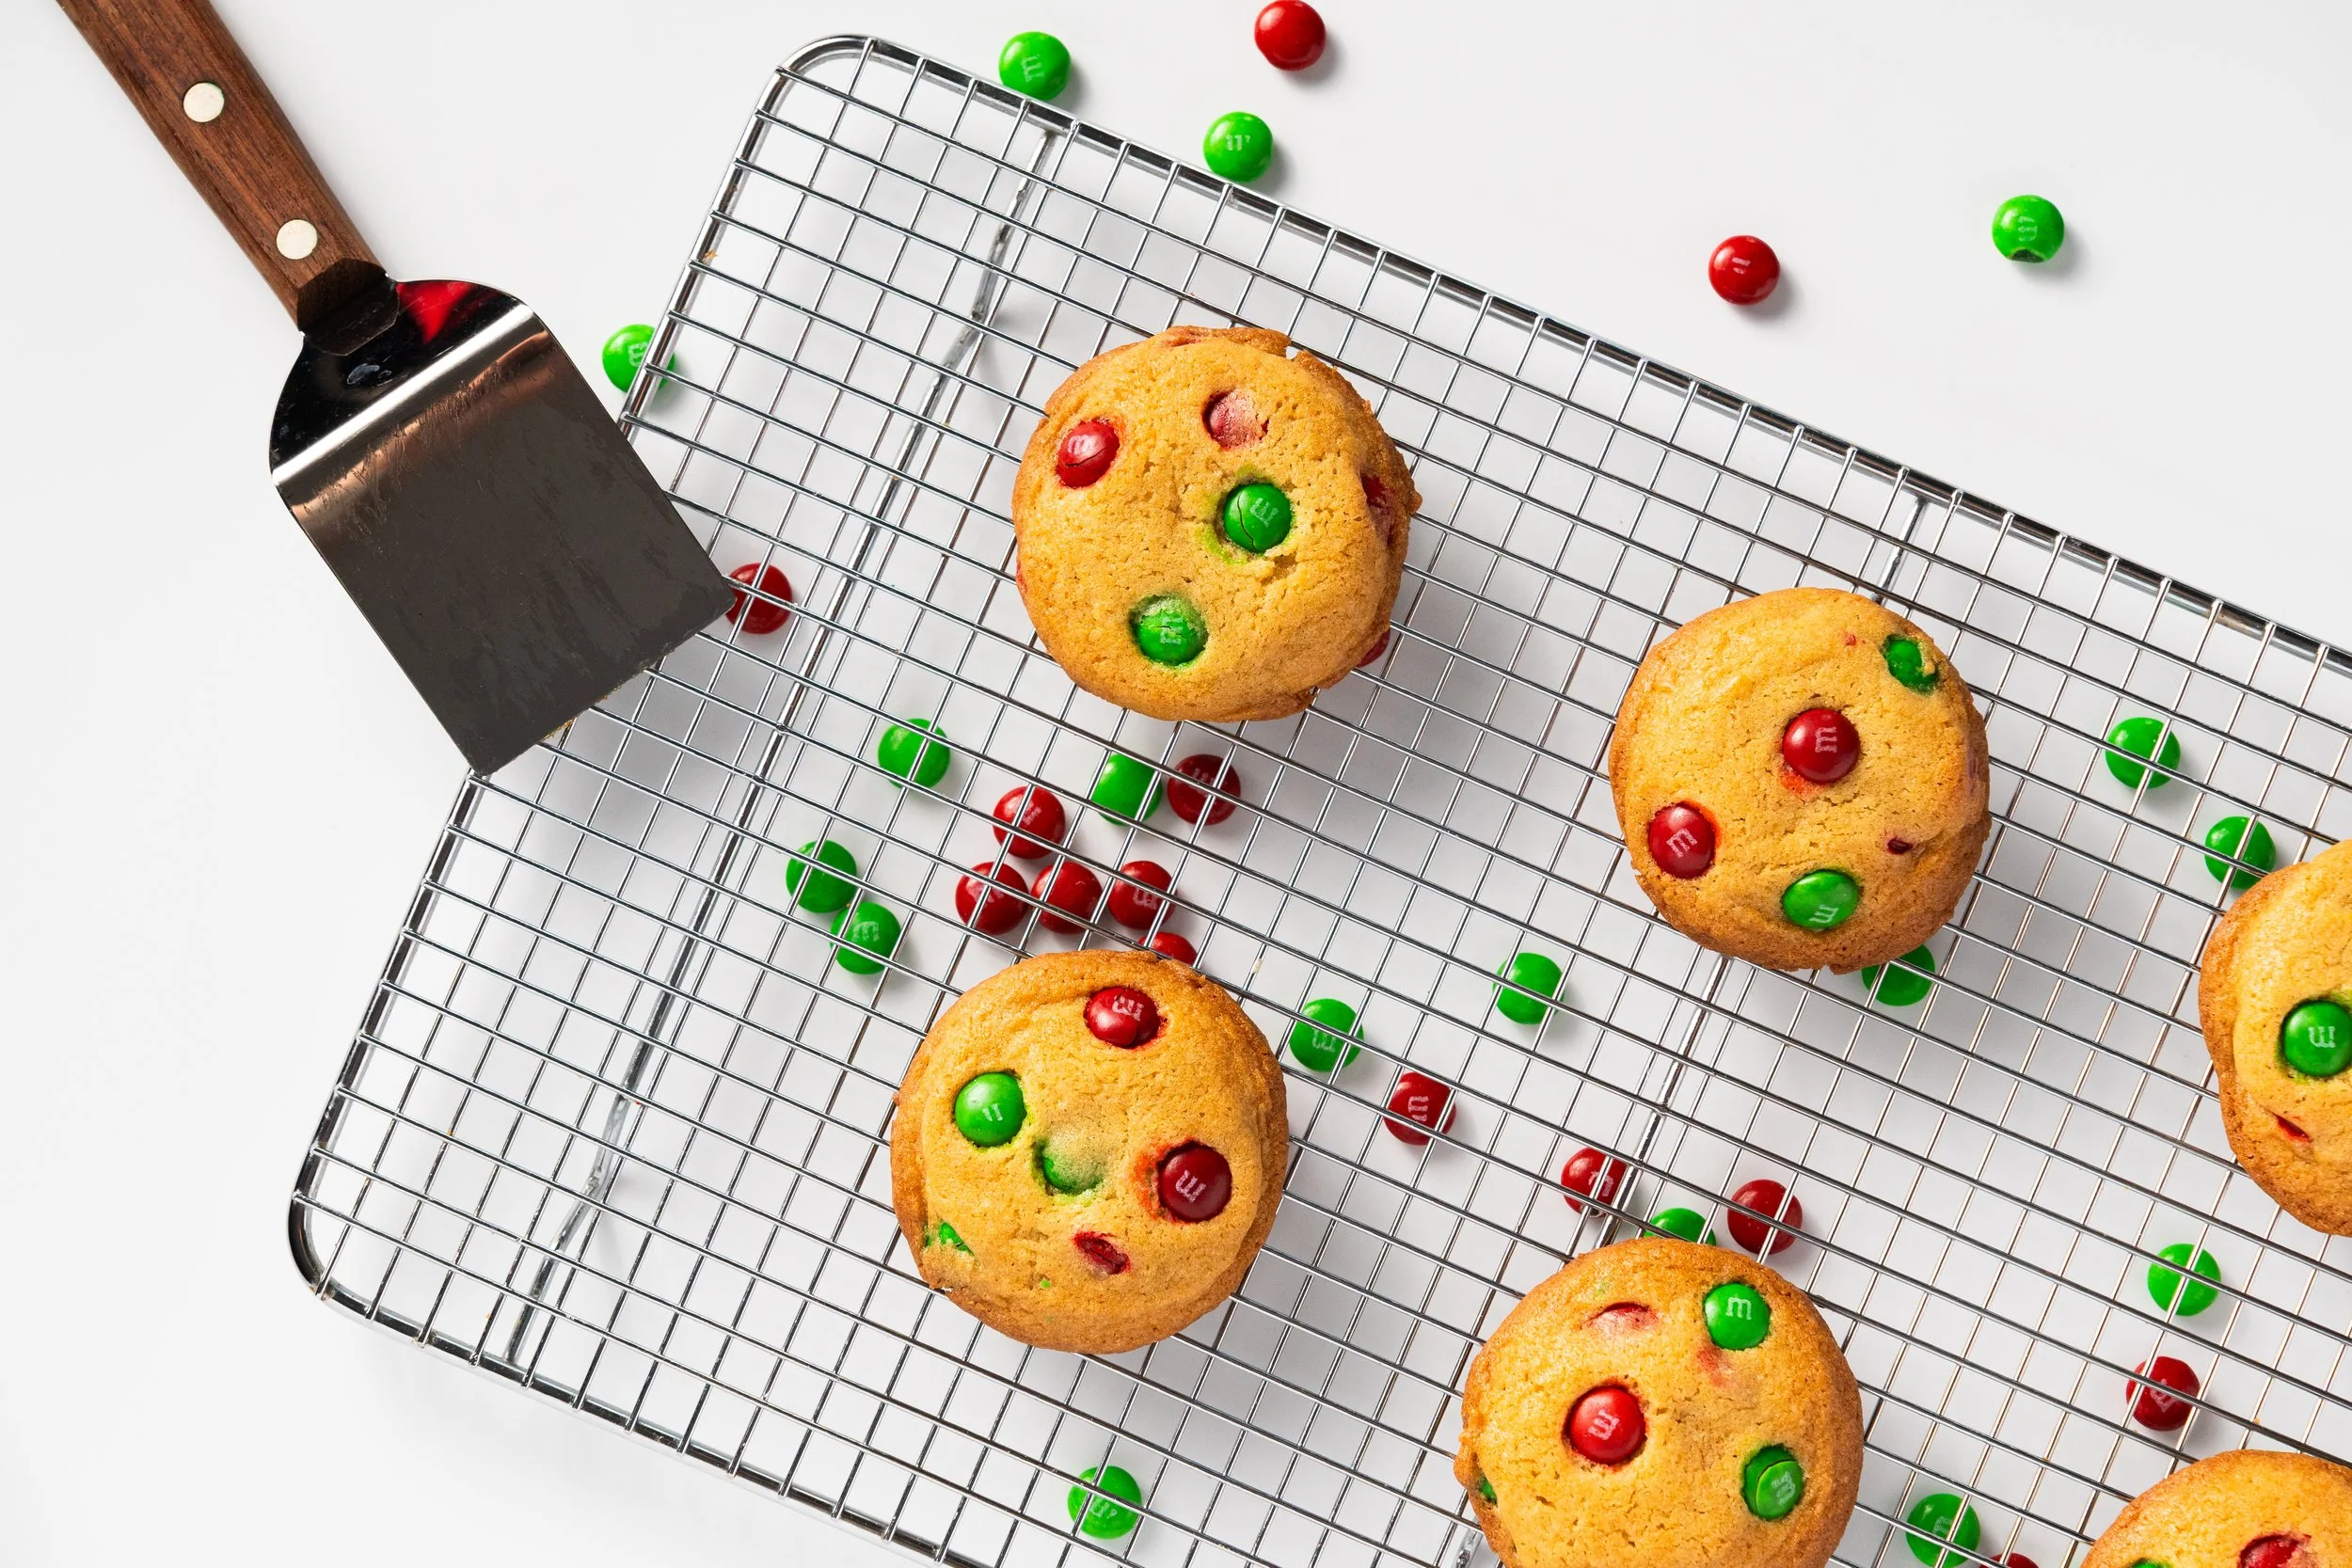
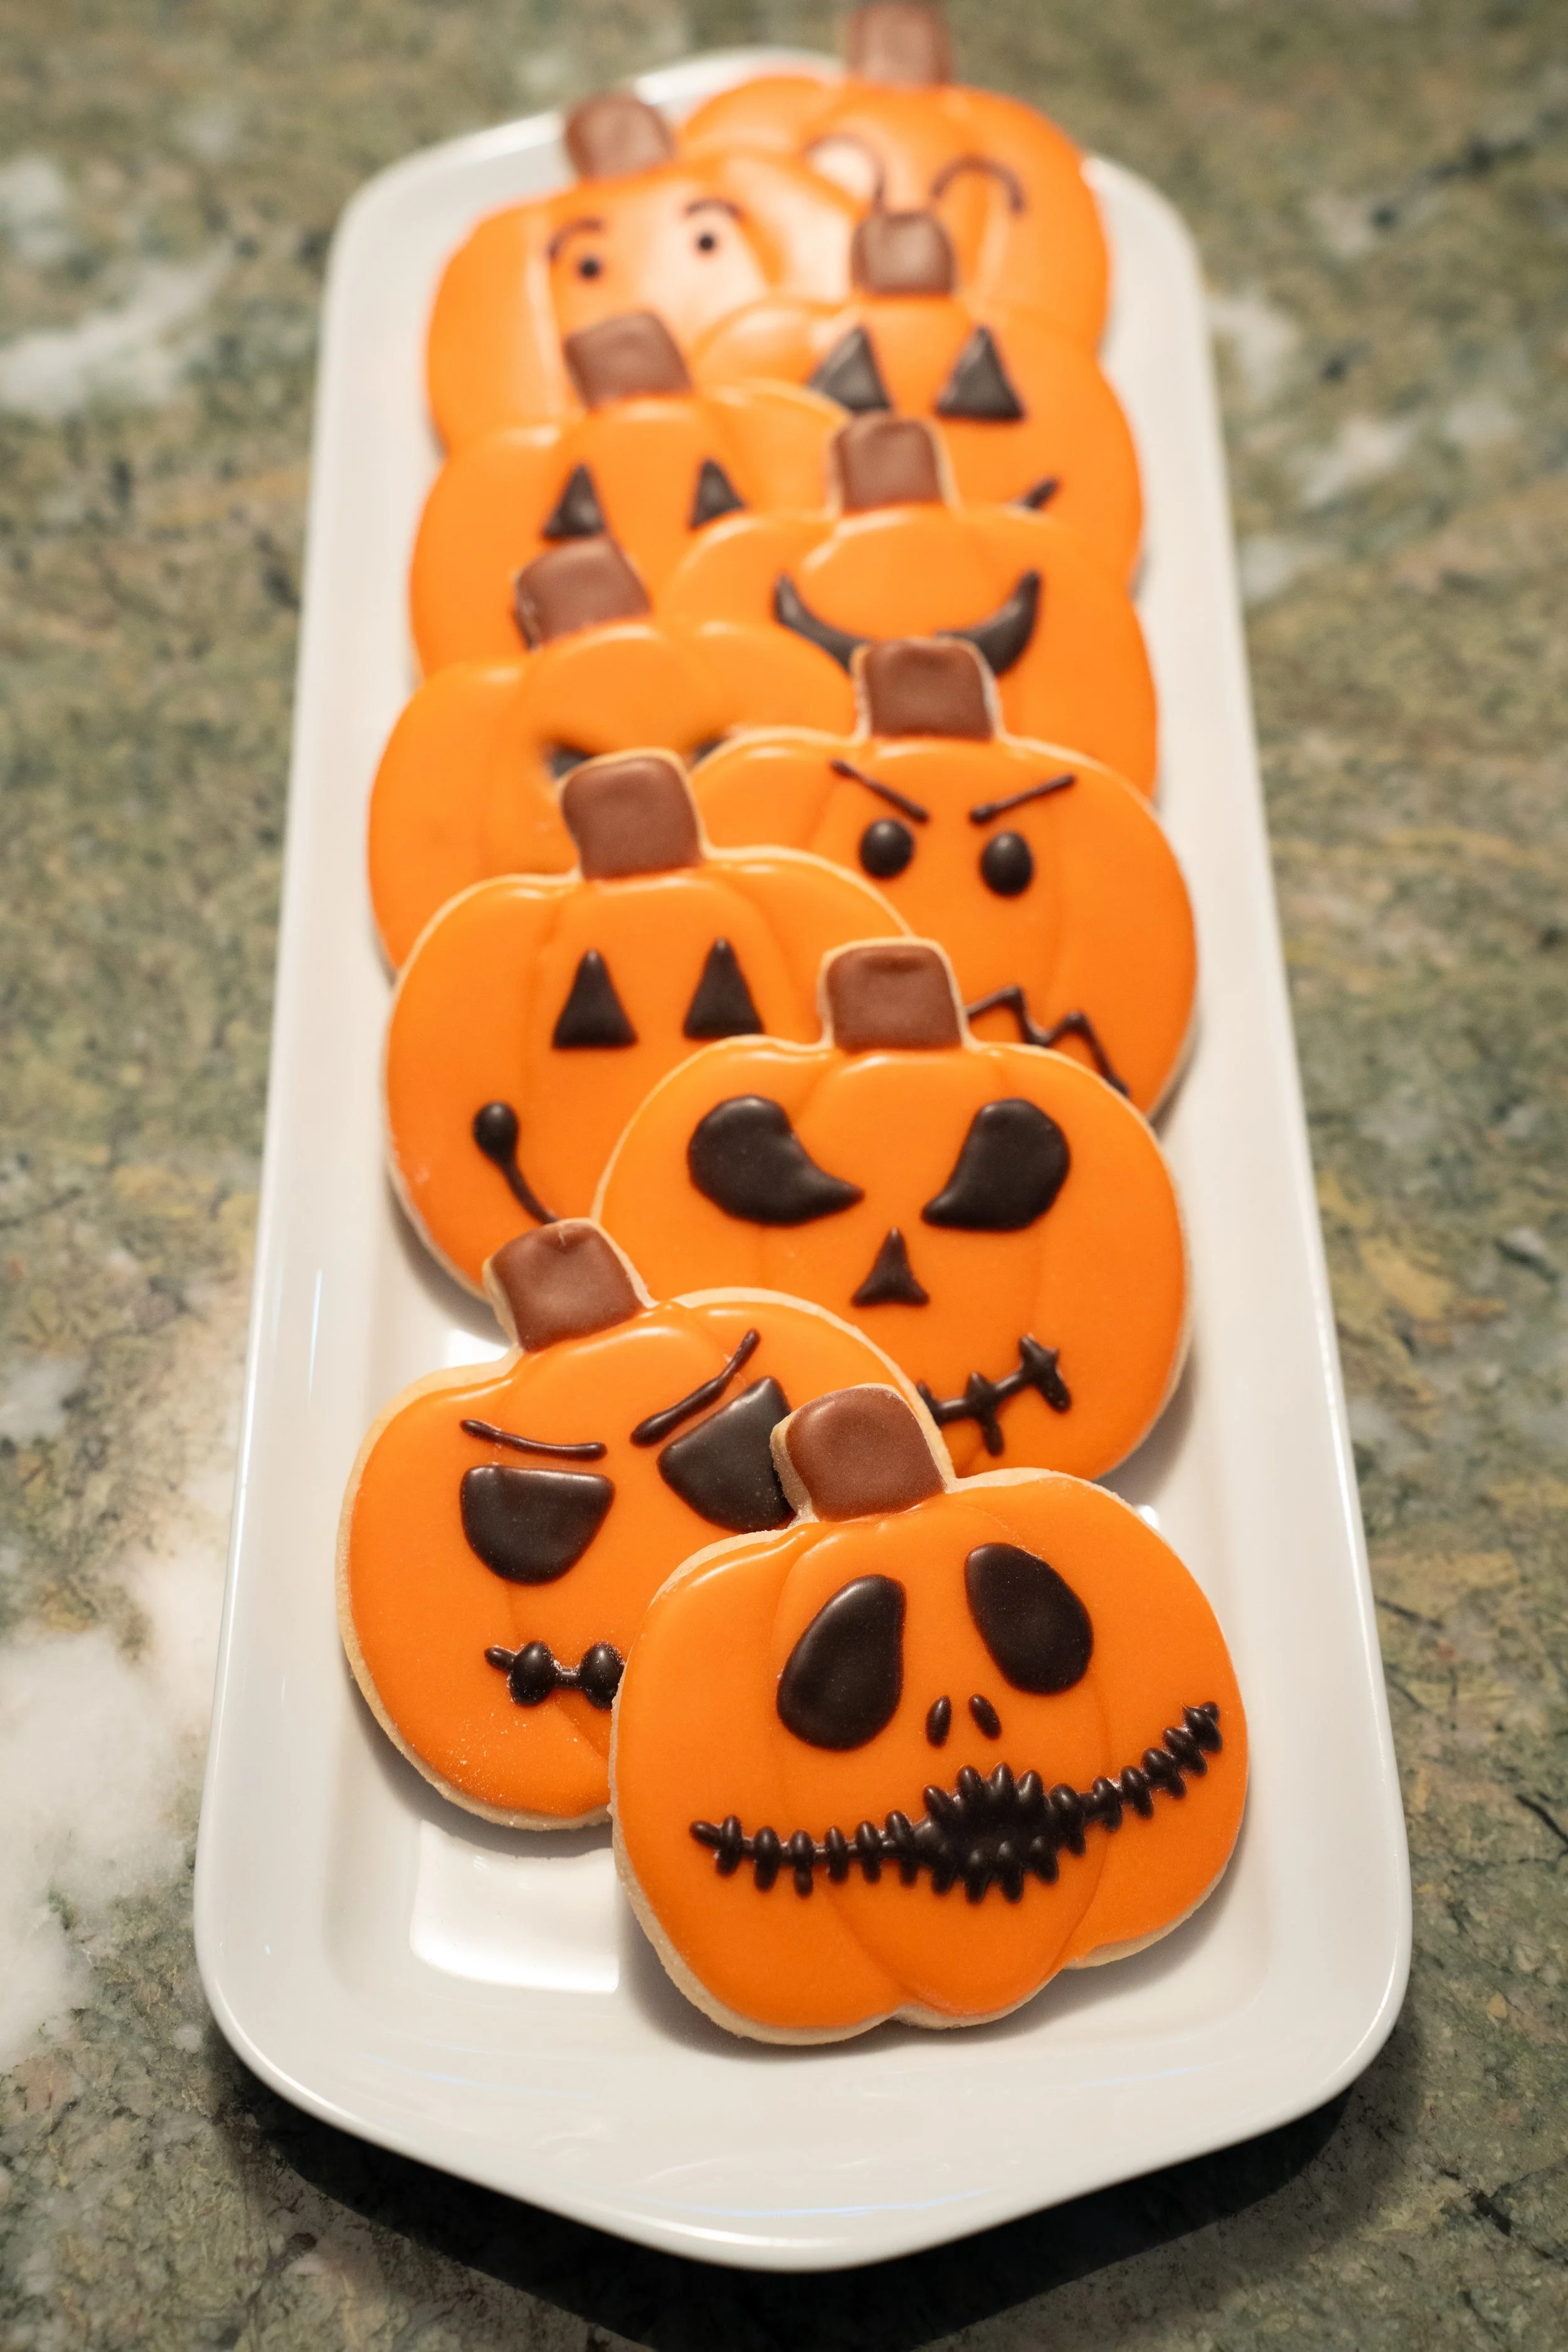
The first photo shoot I did for Rachael was for Halloween. She decorated a bunch of cookies- but my favorites were the spooky pumpkins! The vibrant colors and intricate details just stood out to me, and I really wanted to capture all the fine line work.
At the time, I didn’t have any backdrops to use, so we used her kitchen table. Although not my favorite way to go about it, I wanted to just jump into the fray and start learning. I was also curious to see if we could somehow utilize her overhead ceiling light in case of emergency. I went into this knowing that the proper way to light this is with my Amaran 200d, a professional light, but for the first photo shoot we wanted to approach it with an open mind and with a learning attitude.
T
his is a fun project for both of us to take at our own pace. She’s learning how to run a business and I’m learning product photographer. We both want this to be a low stress project, but with one end goal: creating the best business possible.
Rome wasn’t built in a day, and I have to keep reminding myself that.
Let’s try this again- but better.
I believe that the key to success with any brand is consistency. You need to build trust with your audience, which will then convert into future clients. If someone believes that you can consistently put out quality products, they are more likely to trust in you to deliver what they order. Because of this reason, I think it’s crucial to have one cohesive look across your brand to show that now only is your product consistent, but so is your vision. And on top of that, your look needs to be unique. There’s millions of baking businesses across the world, and thousands in your local area. What sets you apart?
These were just some thoughts I had going into the second photo shoot with Better with Butter Bakery. Now is the time to experiment while the account has a small following. Neither of us have the bandwidth to do practice shoots right now, so every photo we take is going to get posted (unless it’s just, a total mess up). Rachael has never worked with a photographer before so a lot of this is just a learning experience to see the workflow from start to finish. And I must say, she’s very quick to learn & adapt on the go, so it’s been an easy process for me as an artist to work with her.
This time, I wanted to try out some flash photography. Traditionally, food photography is done with a steady light source such as a professional light on a stand or even natural light through a window. But of course, the day that Rachael sent the cookies over was a stormy, cloudy day. Natural light was not an option- so I said to myself, let’s see if we can create a cool looking photo with flash!
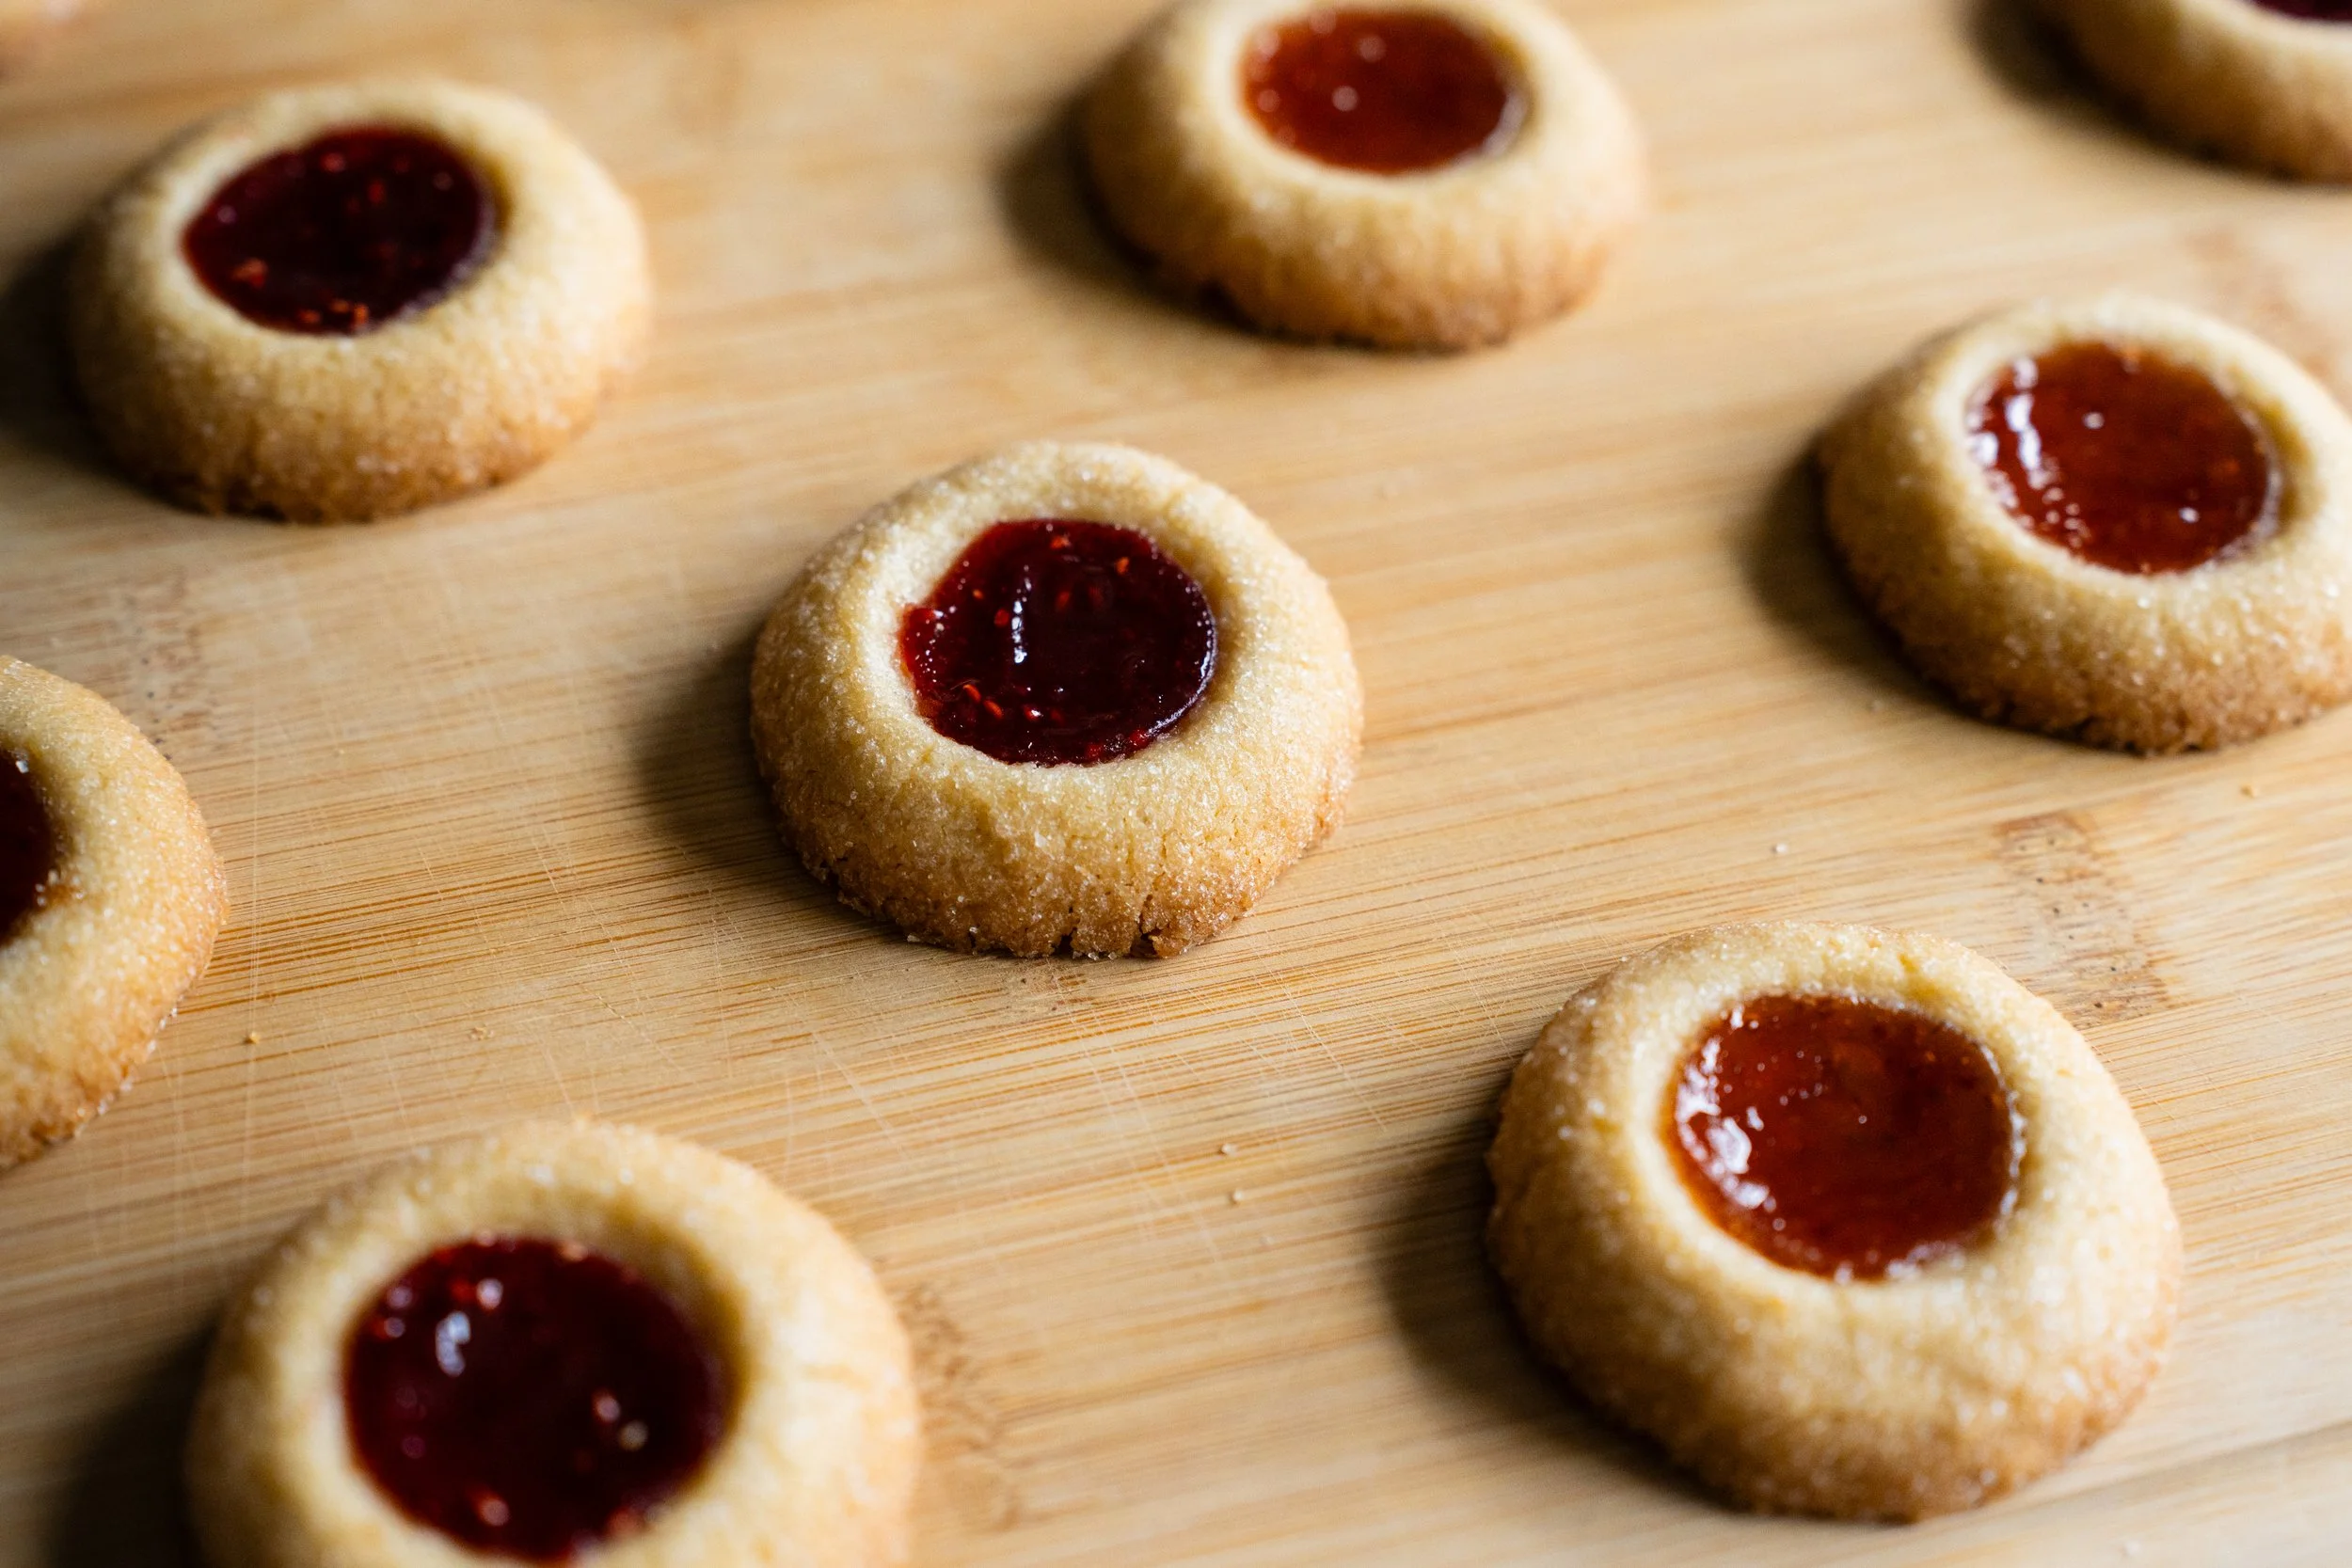
Better with Butter’s most popular cookie- the thumbprint cookie! She fills these with strawberry, guava, raspberry, and more!
Finding the right flash settings was a little tricky at first- normally my subjects are a bit further away when I use this technique. But after a few attempts I found a look I REALLY liked! I really loved the shadows it created on the sides of the cookie, which really accentuated the curvature shape. In some instances, it even highlighted the filling well and gave that a nice texture.
Unfortunately though, there were some downsides to this. Some parts of the image were extremely bright and needed a ton of attention in post, which I typically try to avoid when possible so that I can create the most realistic image. That’s just the look of flash sometimes; bright, high contrast. I’m not so sure this is something that I’m going go use for this type of photography moving forward, but I’m glad that I gave it a shot.
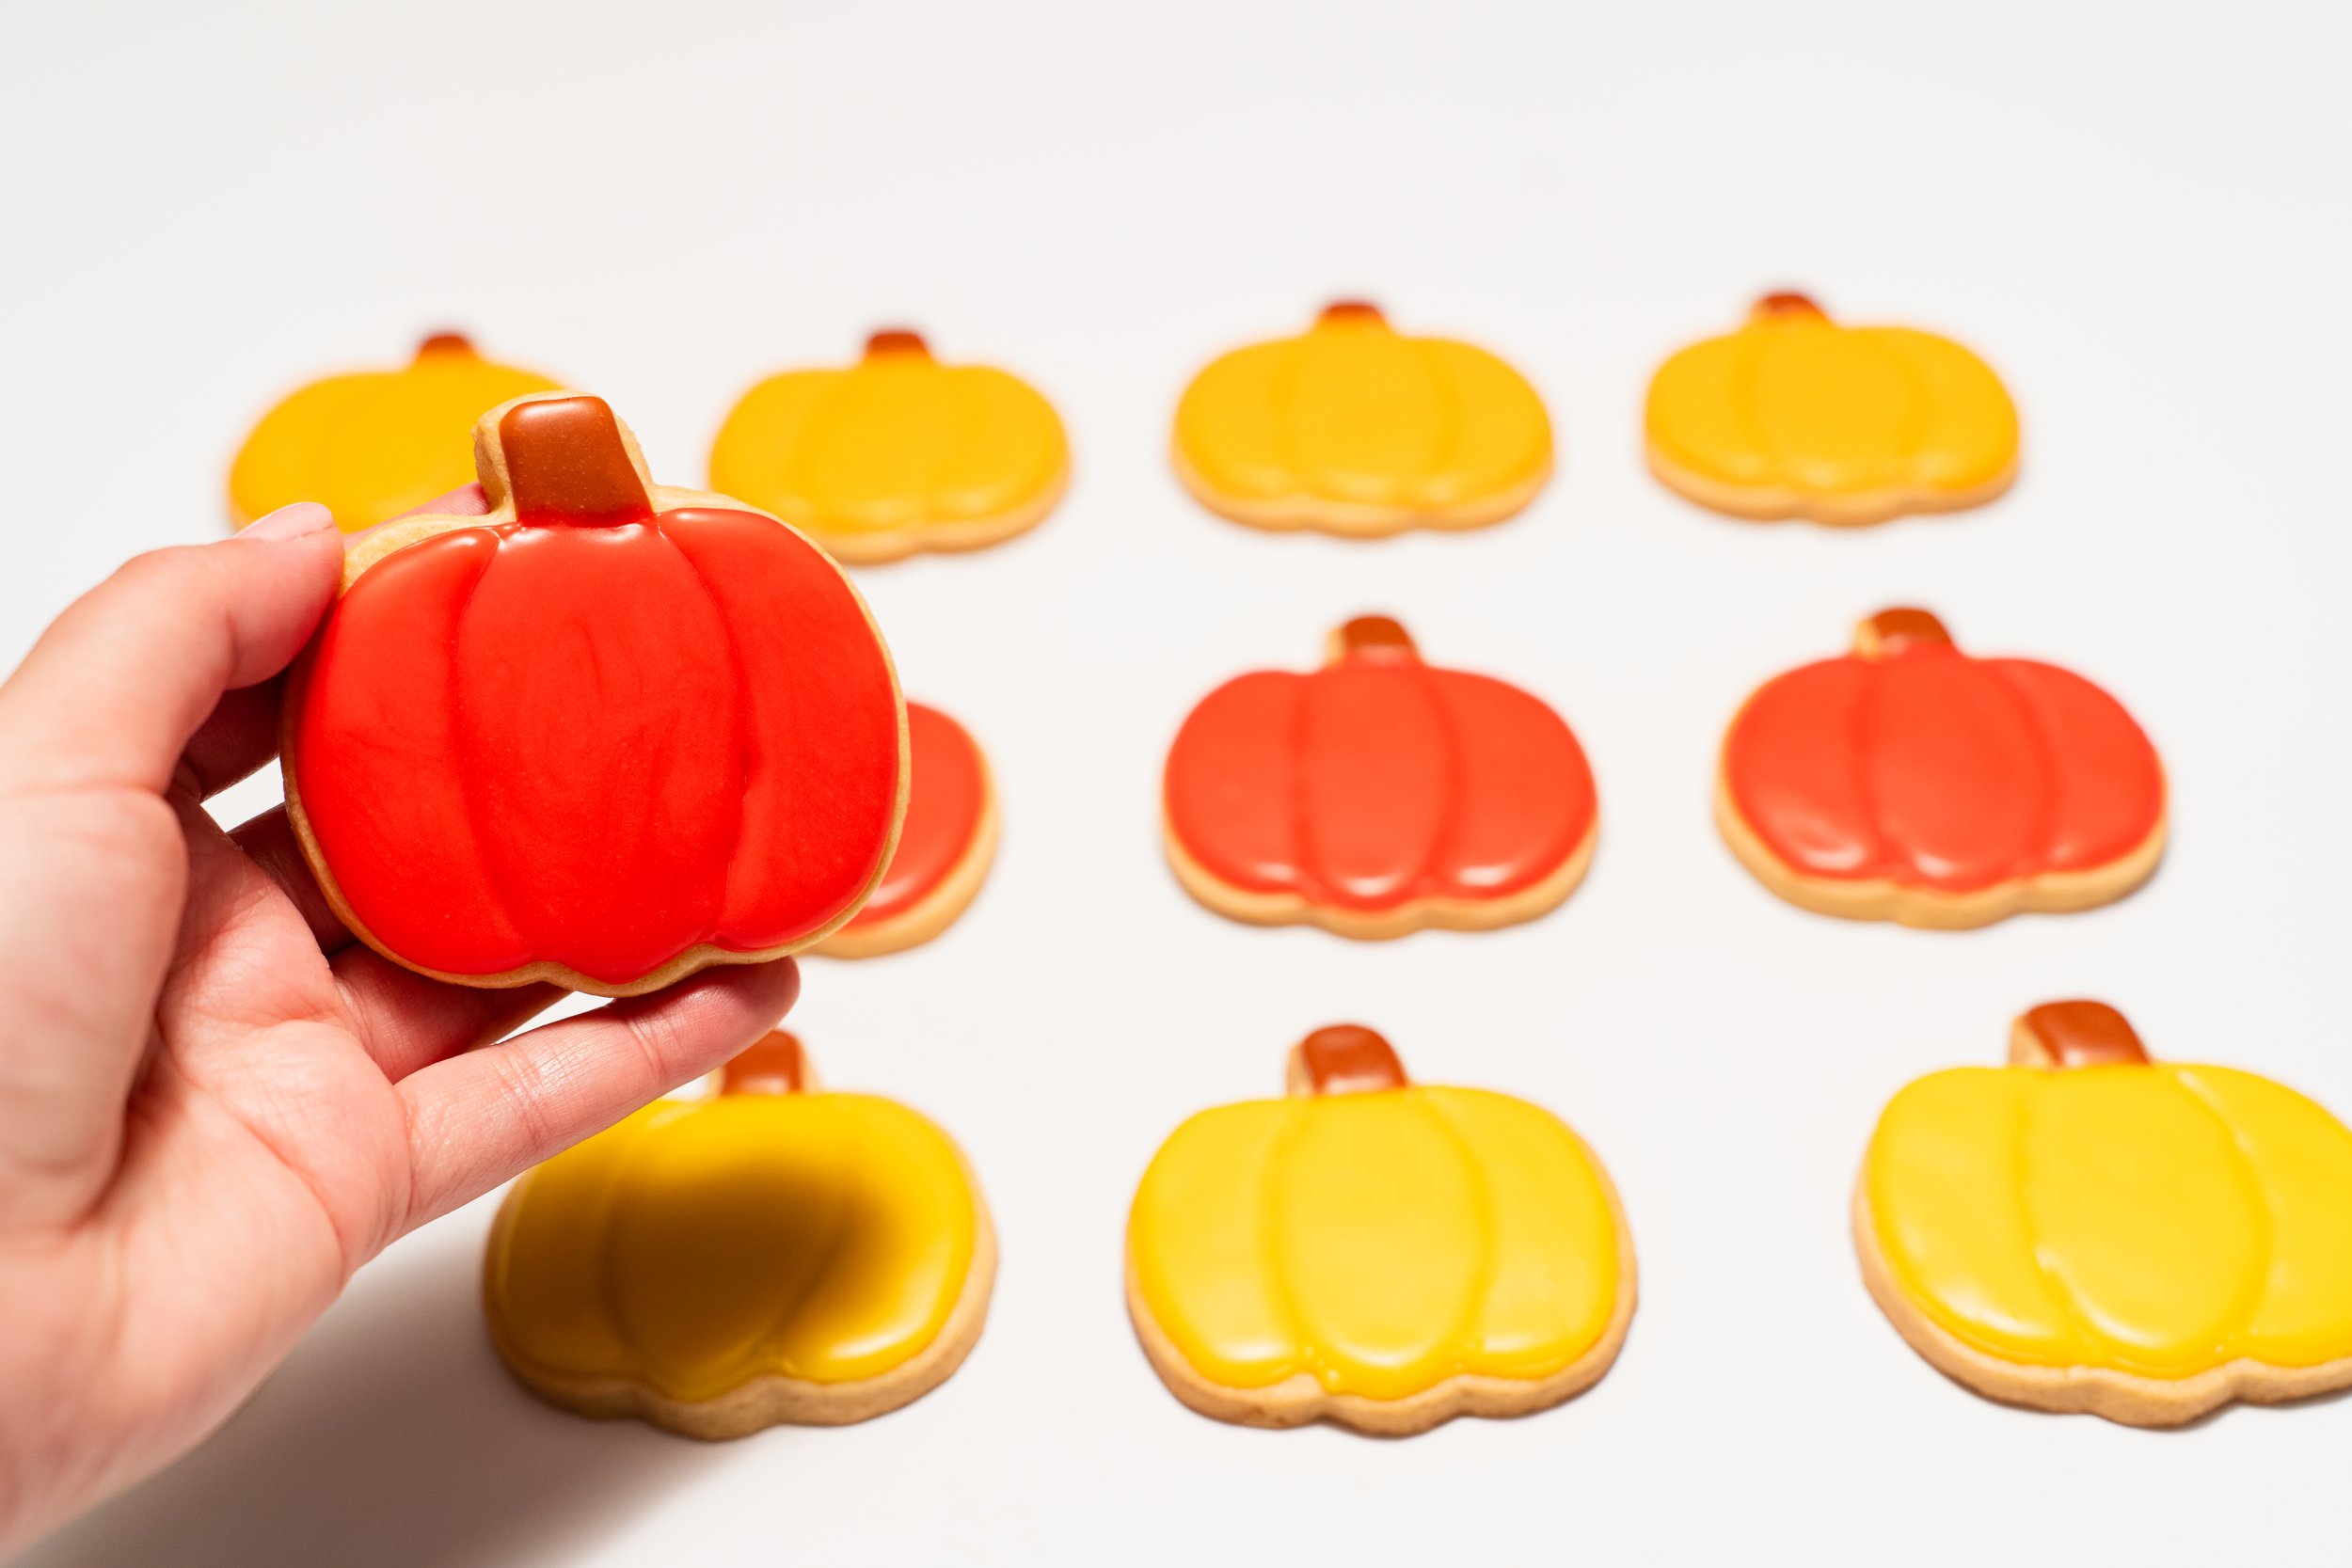
Fall pumpkins created for holiday bundles. I ordered a backdrop for this and was able to give it a test run!
Everything’s starting to fall into place.
Get it- “fall” cuz pumpkins?
As Thanksgiving starting to approach, Rachael wanted to create themed cookies for her clients. They requested pumpkins, leaves, and turkeys, so it was time to break out the cookie cutters yet again and experiment with new designs. Which in turn meant, it was time for me to try a new technique as well- backdrop work.
I went online and looked for a white, easy to clean backdrop that we could use for the photos of the cookies. I went with white because it has that “clean” look that lets the viewer focus on what truly matters- the vibrant colors and detailed craftsmanship. It doesn’t distract anyone from what truly matters; the product itself! This is a simple white vinyl I found that can roll up into a tube for easy transport. Now I can take still take professional photos on the go or at my home studio!
I immediately saw the difference in quality once I put the cookies on the table. I ran a series of three lighting tests: natural daylight, flash, and overhead fluorescent. The best ones by far are the flash photos, but once again I ha to be extra careful due to being super close to a pure white background. Although I have to say, I think these actually came out pretty good for my first attempt with this!
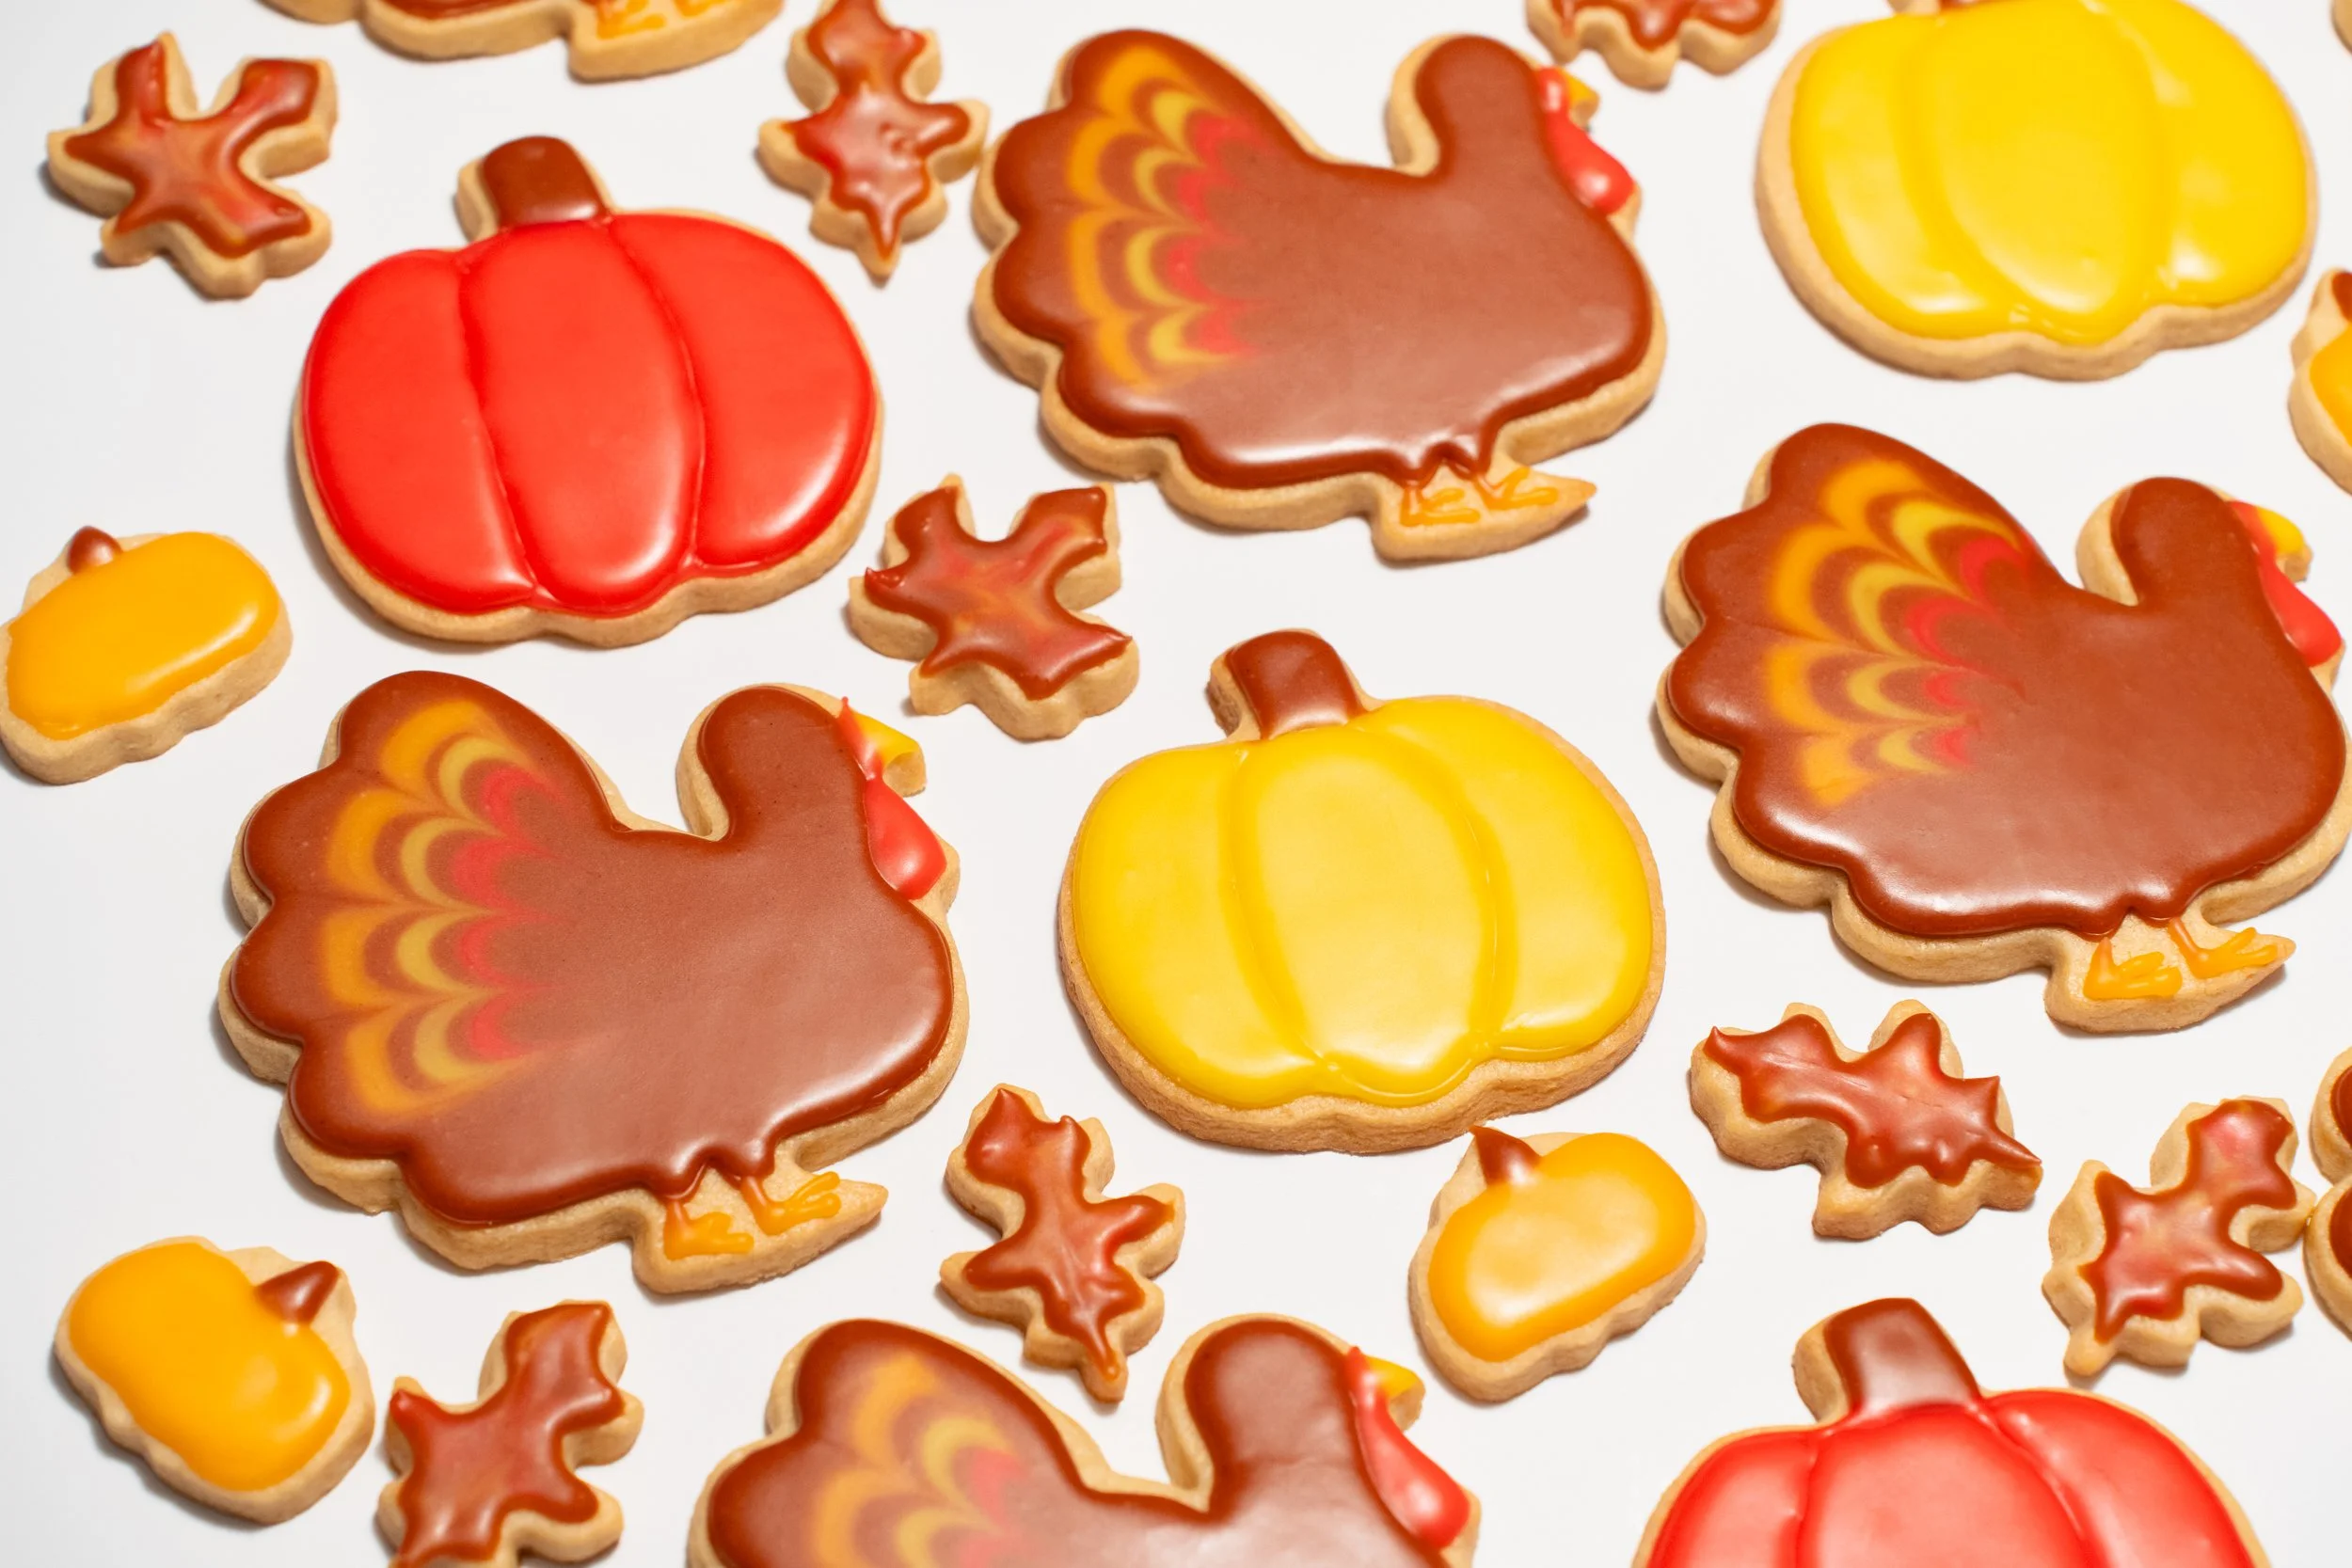
Turkey cookies for clients.
Experimental phase over. Time to lock in.
After taking a look at how the previous few shoots went, I decided to stop beating around the bush and just dive in. It was time to do a proper lighting setup and go full throttle. Something from my photos was just missing and it was time to show the world what I could do when given the right tools.
Up until this point, I’ve only ever used a professional lighting setup for shooting moody interviews, as I only had one light: Amaran 200d. This light is great for my needs, but I do run into a few issues with it. First, I can’t change the color temperature of the light, so I need to have complete control over the ambient light to be able to use it- which, if I’m being honest, I usually don’t; since I usually shoot outdoors. However, this particular project posed a challenge to my skills and my ability to adapt, learn, and grow.
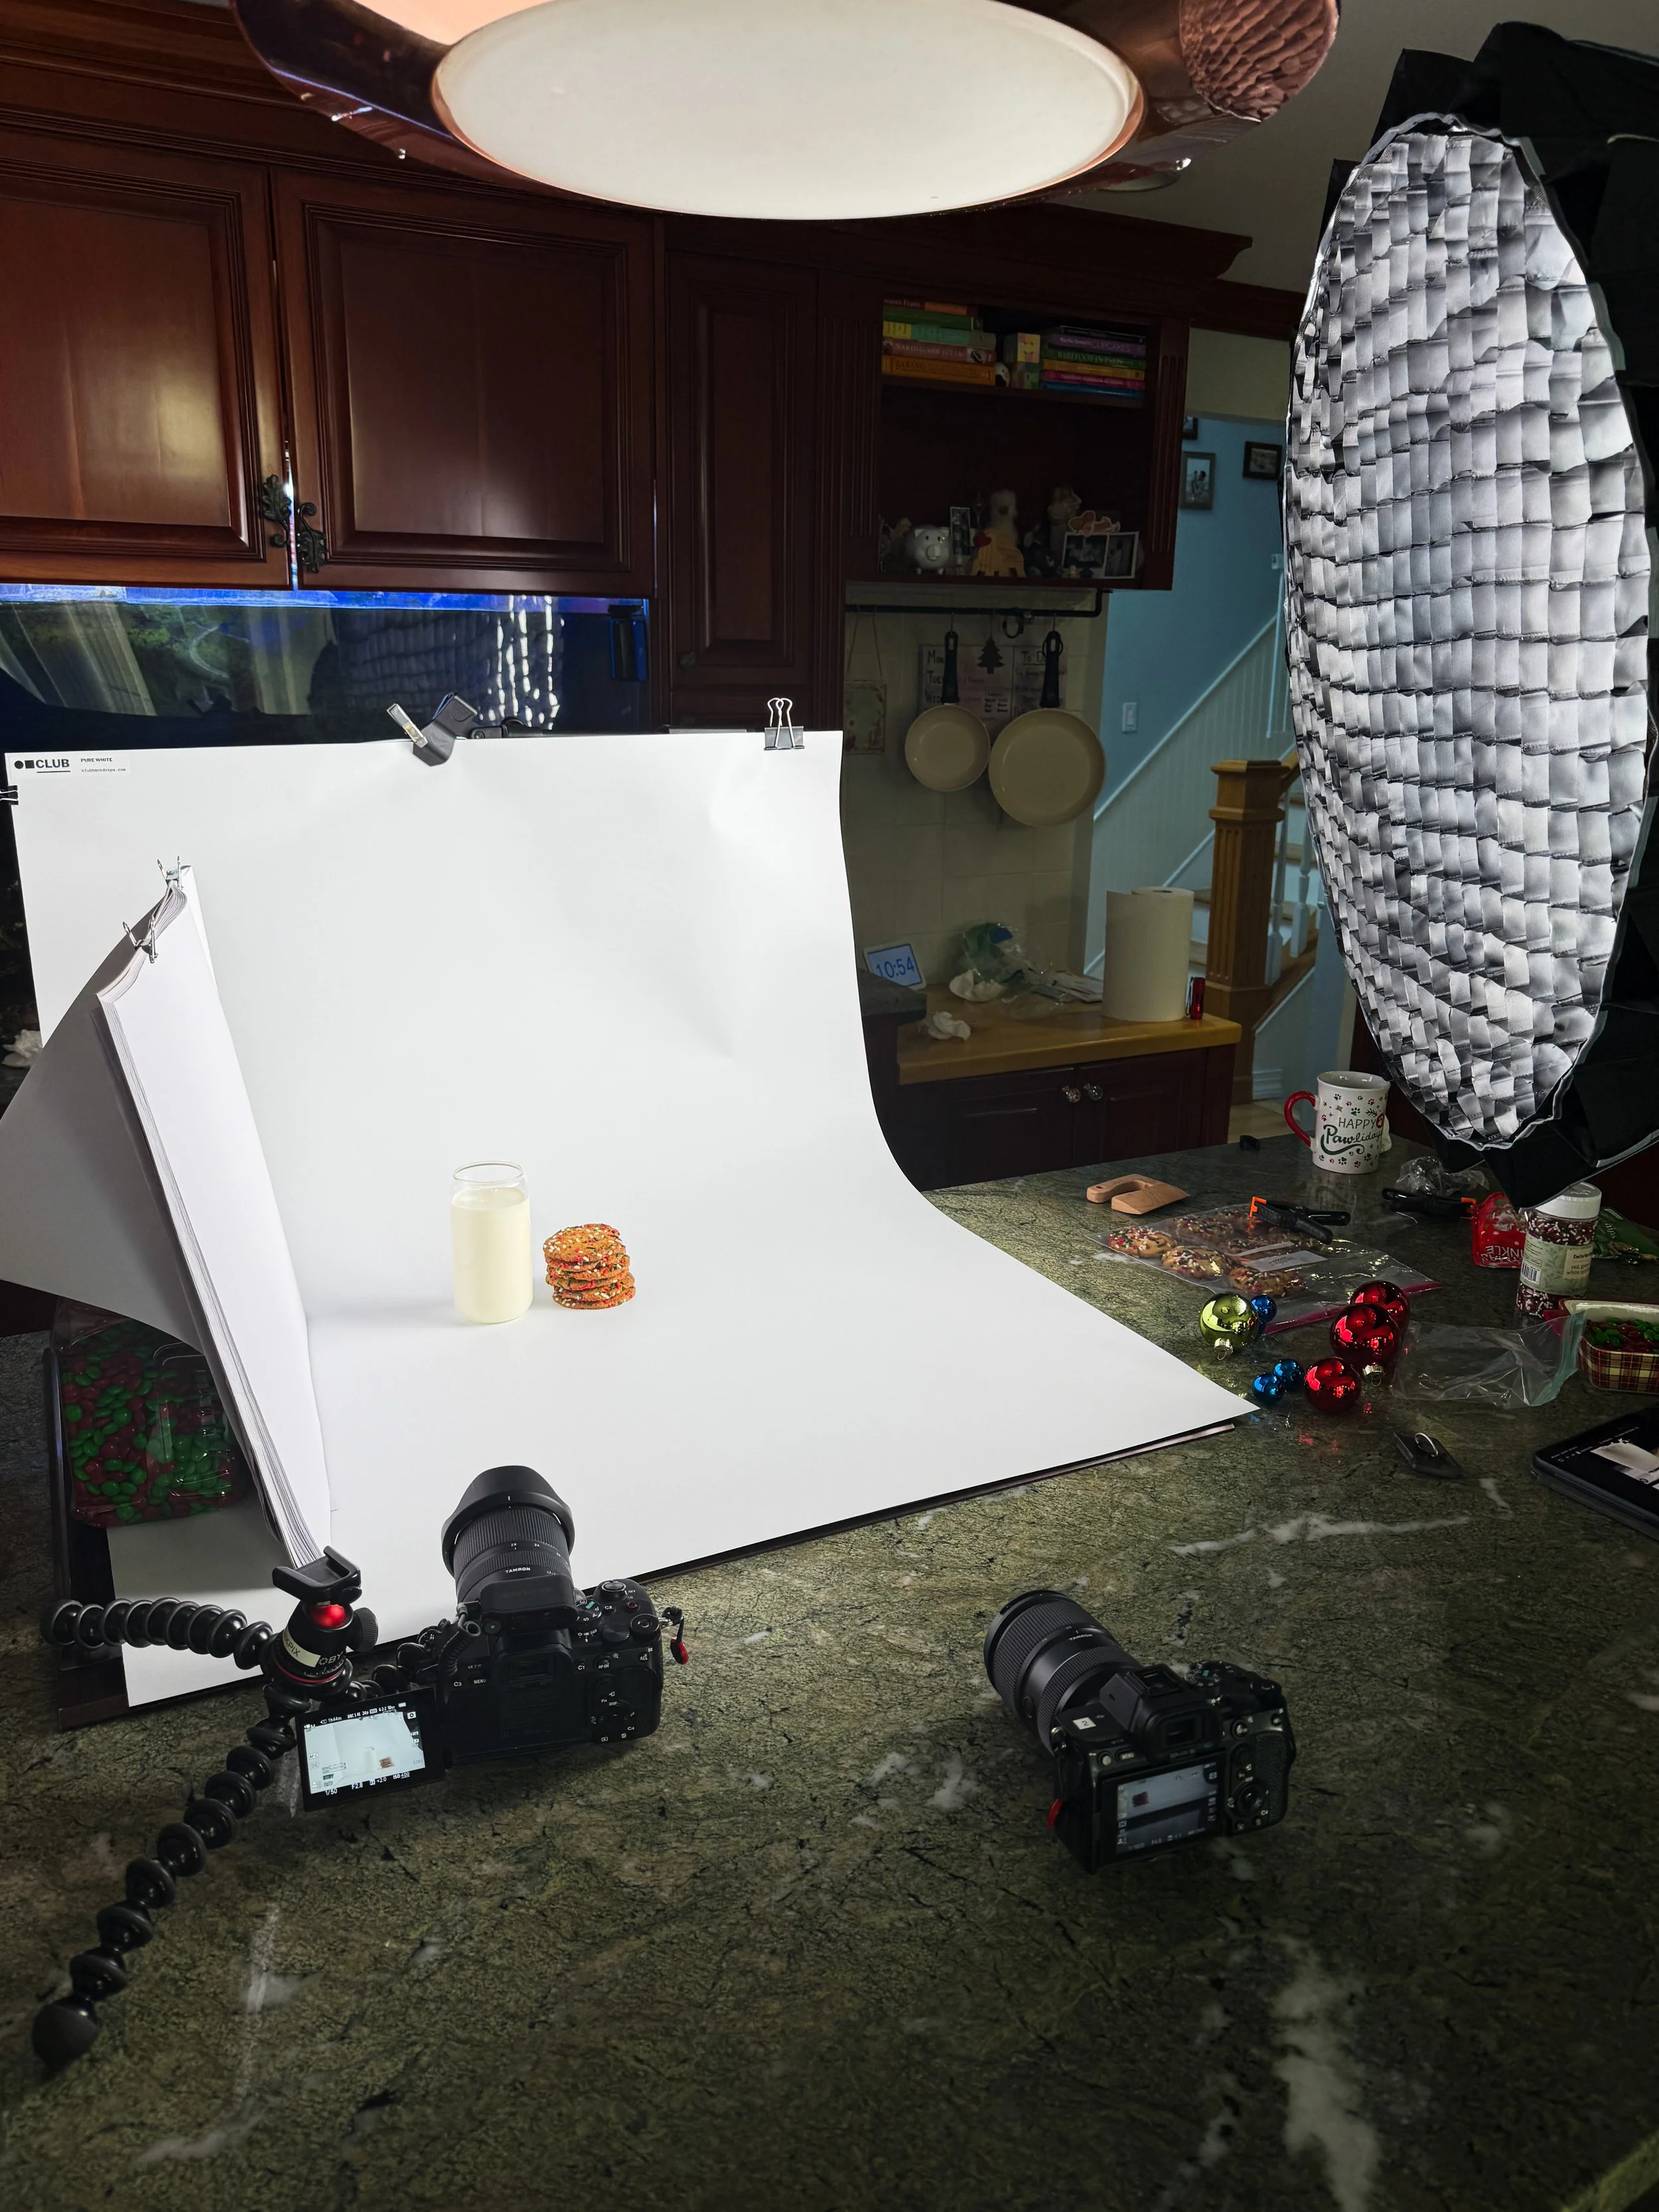
I used Rachael’s kitchen table for the scene creation. Off to the right I have my Amaran 200d with a grid filter on it, at max power.
For shoots like this, I think the Amaran 200d really excels. I shut off all the lights on the floor and had only the Amaran turned on. I used a grid filter to spread the light out evenly (Although looking back, I’d like to try this again without the grid filter and see if I could get a slightly harsher light) which gave everything a very soft look. Originally I wanted a harder shadow, grunge look for Better with Butter’s social media, but since we were still in the experimental phase, I figured let’s try this and if we are unhappy, we will adjust for next time. Truthfully, I think this look really paid off and made the cookies shine!
The only thing I would say is that the Amaran 200d is just barely strong enough with this diffusion on it. I had it maxed out at 100% power and still had to crank my ISO up pretty high for the action shots. Due to the limited space, I was unable to move the light closer to the stand, which definitely would have helped. However moving forward I’ll be doing all these shoots from my house which will allow me to have more control over everything.
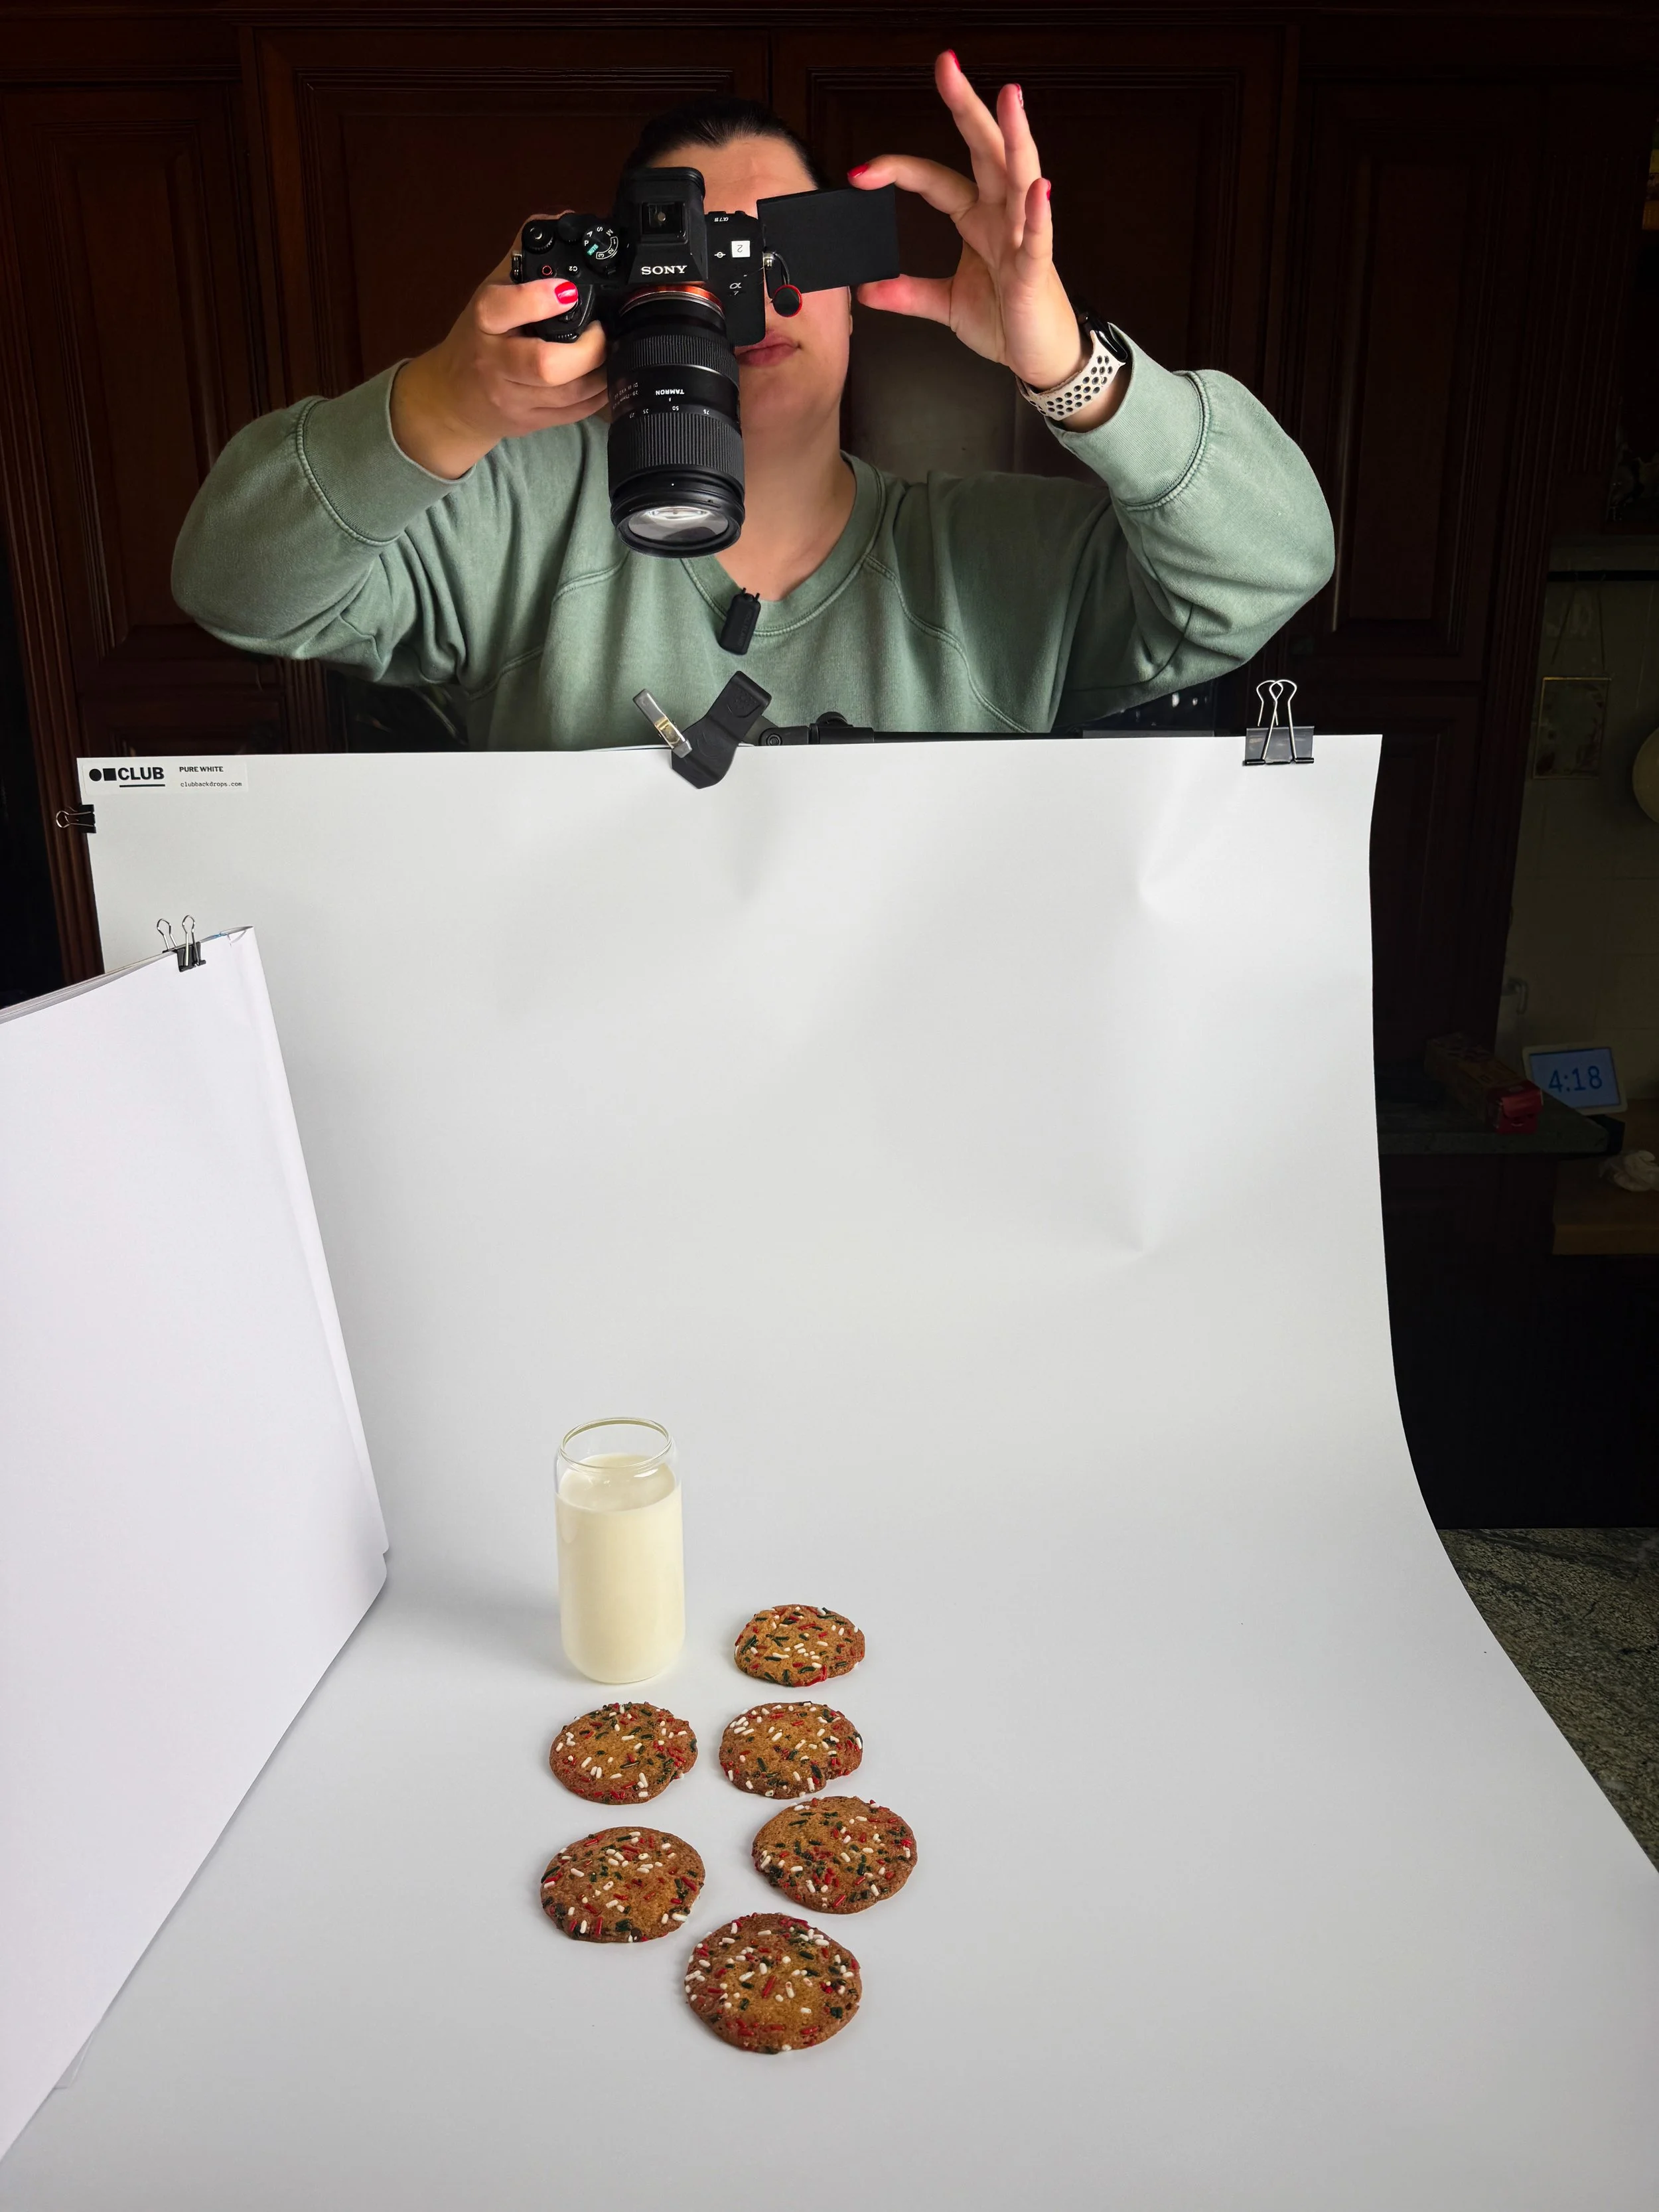
Doing overhead top-down shots handheld is way more difficult than you’d think!
One more thing I need to keep in mind.
I know, I know. I need an overhead rig for the camera. But not only are those things not super mobile, but I also didn’t have the parts I needed yet to get this set up. The good news is that after this shoot, I went ahead and did some research into what I would need and purchased the necessary items to get it going. This shot really showed me the importance of having an overhead rig for your camera, and in more ways than one.
To start, it’s really easy to get a consistent look across all photos. Just swap out the items and snap a picture. And with today’s technology, I can easily just connect my camera to Lightroom through the Tether function and fire off remotely while seeing exactly what my camera sees. This is super useful in a more “permanent” setup which is my plan moving forward. But I also realized something else- it’s really easy to point down and be just ever so slightly off of 90 degrees and create an uneven image that you can’t rotate. This causes me to lose a lot of creative control over the image and is something that’s just so easily avoidable that it’s silly to let myself even run into this issue. Plus, it’s super frustrating to frame up the perfect image just to realize that you need to fix something on the table, and then struggle to get the same composition back. This is just a no brainer for next time.
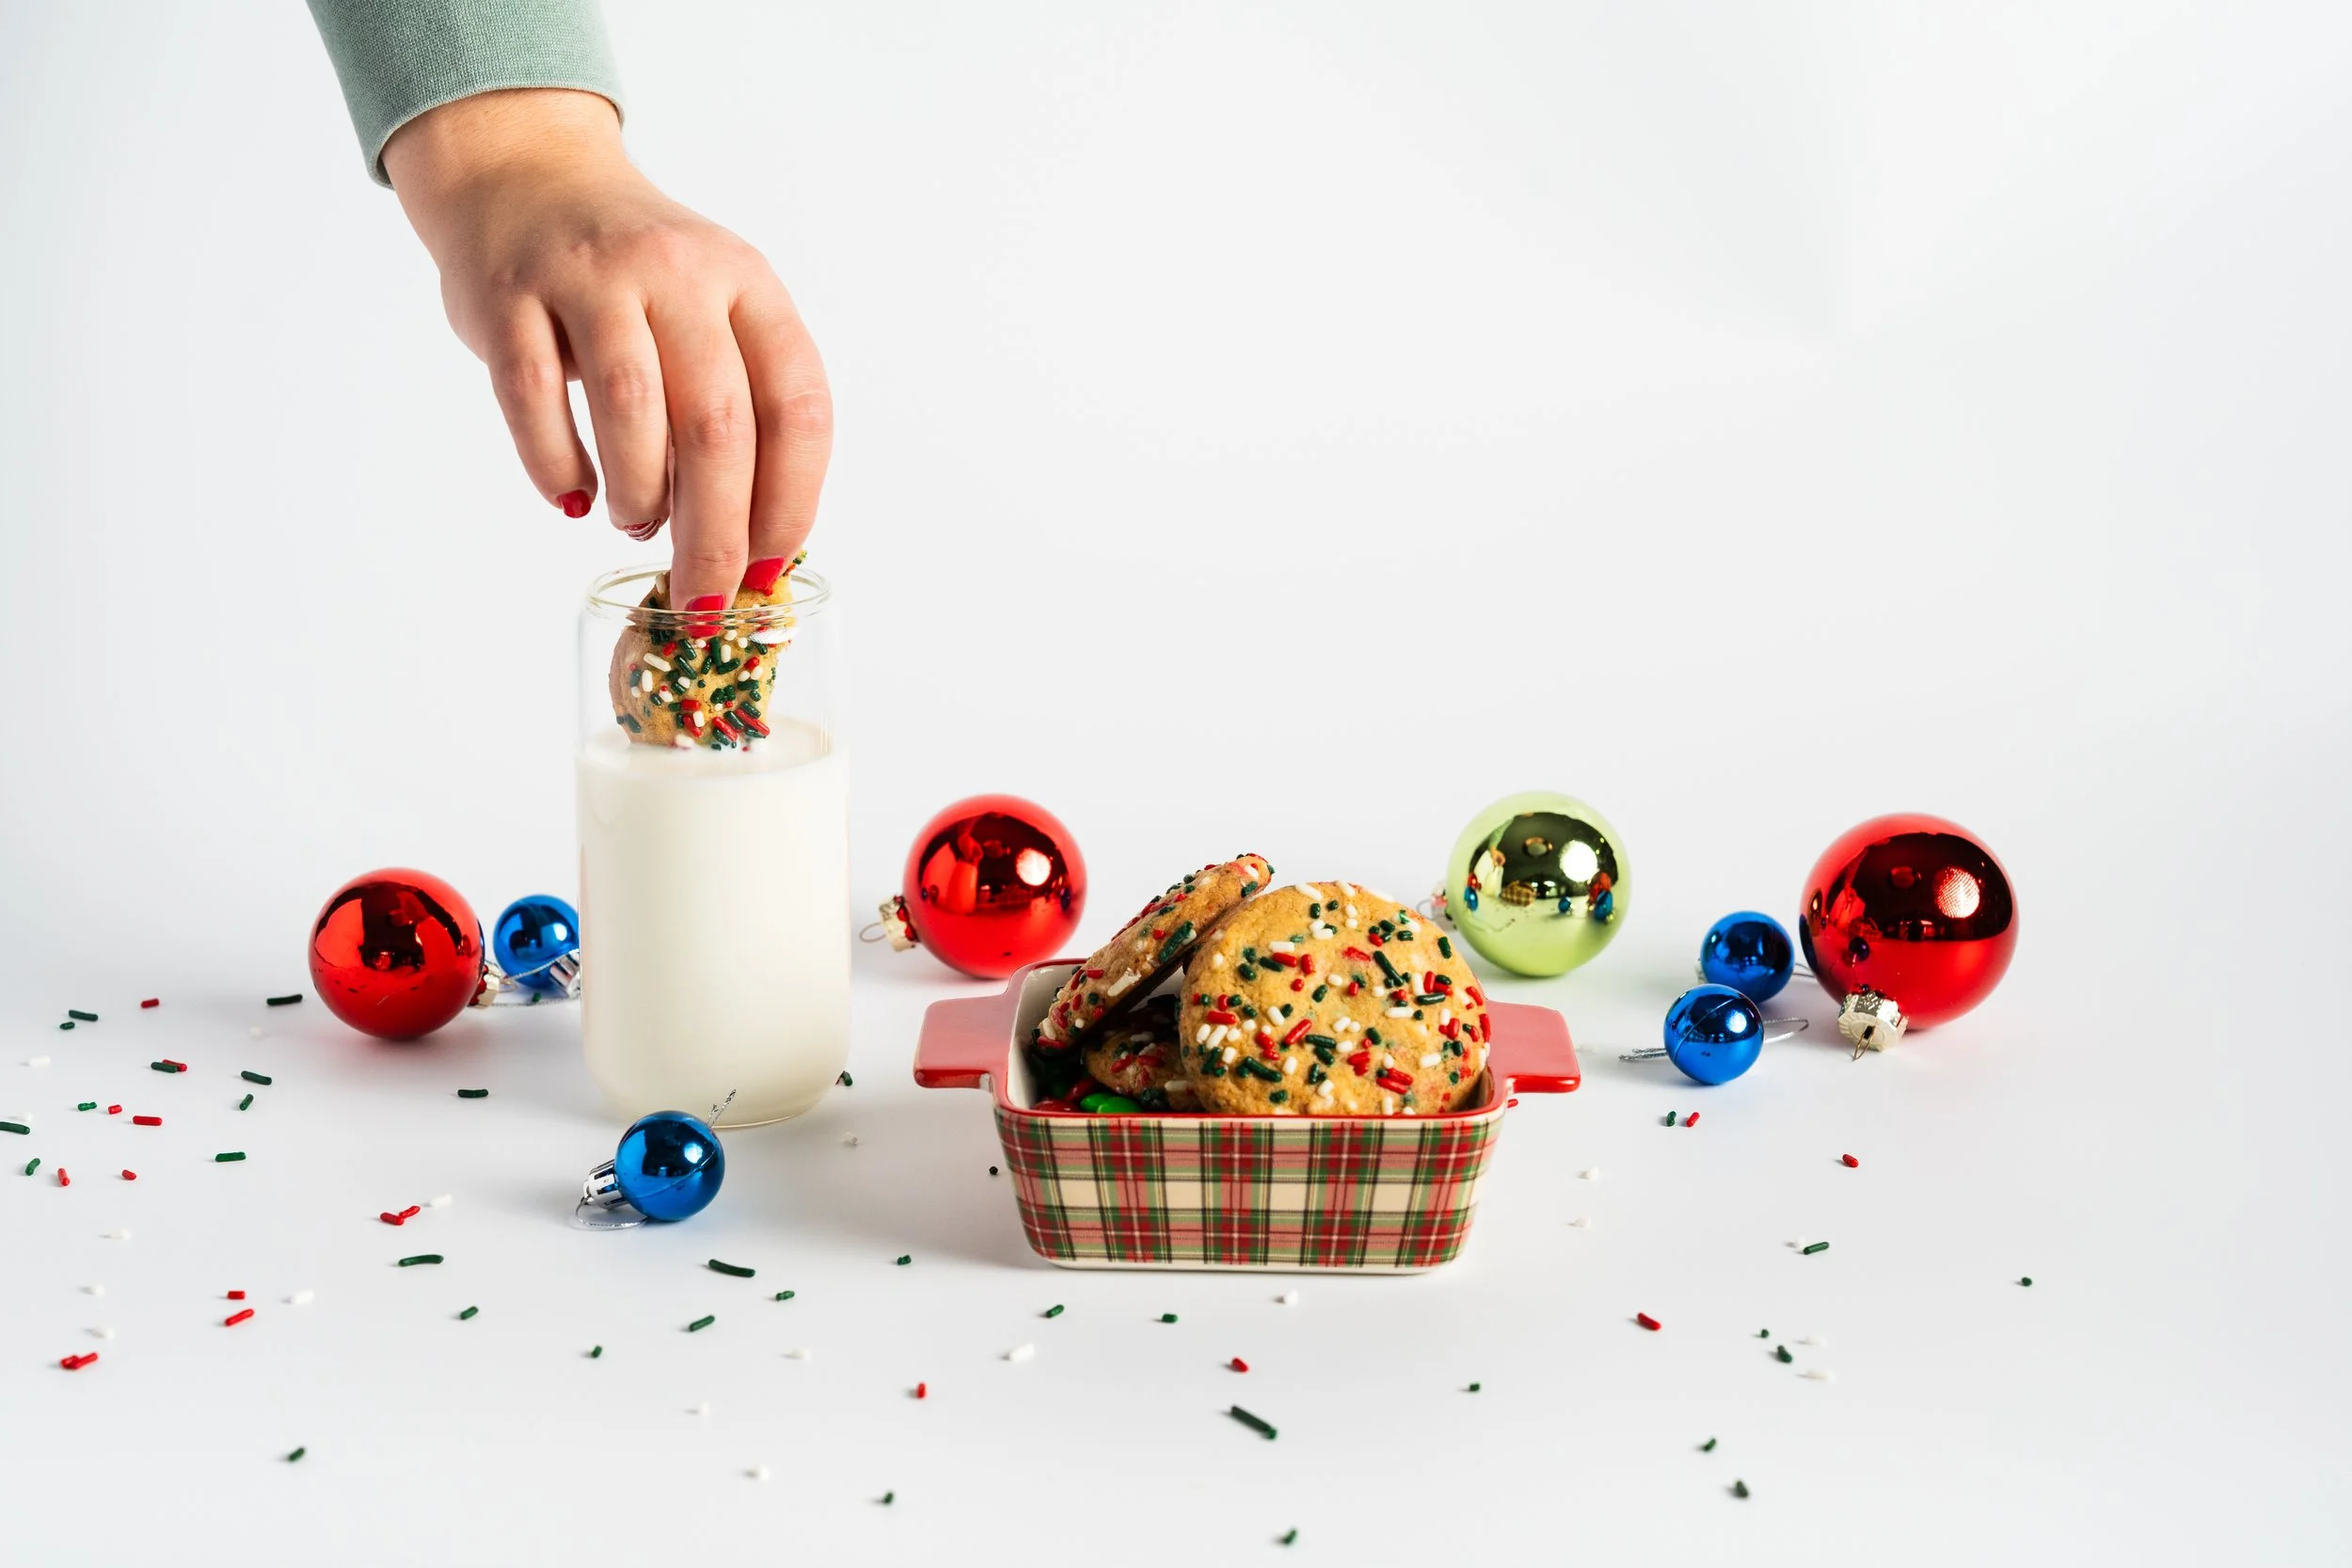
One of my favorite images from the shoot. Next time, I have some ideas to better position the ornaments that I think would look way better.
That’s a wrap!
Moving forward after this shoot, I realized something critical to my future as a creator: stop limiting myself. Stop thinking “I’m just an event photographer” or “I can’t make my photos look like this” or even “I need more gear to do this”. This shoot was 1 camera, 1 light, 1 tripod, and 2 c-stands. That’s it. I easily could have done this years ago if I wasn’t so stuck in a box of what I thought I was, instead of finding out what I am. I am a creative that uses a camera to capture photo & video visuals who is on a journey to learn more every single day about something I love. What’s next for me is uncertain, but I can safely say the sky is the limit for me.
In 2026, you’ll be seeing a lot more from NikPix Productions.